
1 There are many body forms out there for guitars. You can copy or create your own, and seeing as how you are building a personally customized guitar I suggest that you create a design that is all you. But keep these things in mind when you are being creative:
- The length from the 12th fret to the nut needs to be the same as the distance from the 12th fret to the saddle of the bridge.
- You need room for the hardware and controls.
- Make it comfortably.
- Keep in mind that playing on the upper frets needs to be rather unhindered.
- Don’t make it so big that it will way a ton.
- The pickups go between the bridge and neck so don’t stress about those.
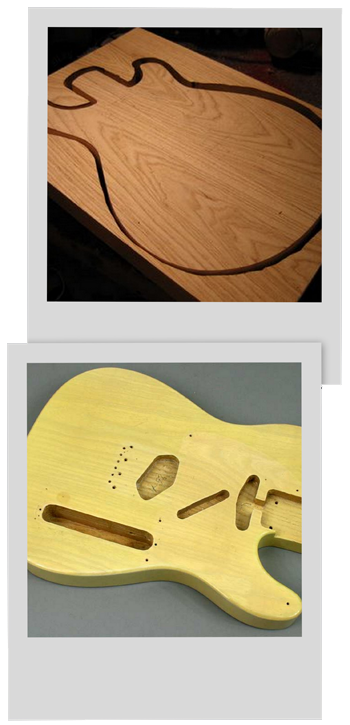
2 Now make sure that you place the neck on the body piece of wood and trace the sides of it. Then draw those lines straight back to see how things align with your body template. After lining up everything trace the body outline and the neck heel. Now by routing out 1/4” increments with a routing tool route out a 1” deep cavity for the heel to fit into. Then trace out the bottom of the heel onto the body cavity just created so and drill them with a 3/16” drill. Now cut out the body of the guitar.
3 To locate the bridge position measure the distance from the truss rod nut to the 12th fret. Then, with the neck bolted in place, measure that same distance from the 12th fret into the body and make a mark on both of the lines previously drawn that show the sides of the neck. By connecting those marks you know where to put your bridge or tremolo (we will use a tremolo here).
4 Now line up your tremolo ends with the line you drew and trace the outlines. Then rout out the cavity for the tremolo piece. Then lay out where you want your pickups and route those cavities as well. Now figure out the layout for your knobs controls, mark them out. Then using a drill bit that is the same width as the threaded shafts drill straight through the body. Now on those holes on the back lay out the components and draw out an electronics cavity for your guitar and route it out and if you want create a cover for it (you might want to route out a small lip for it to rest on).
5 Now you just need to drill a line out hole in the side of the components cavity. And last of all drill a few channels for wire. First from the tremolo cavity to the electronics cavity, then from the pickup cavity closest to the tremolo to the electronics cavity. Last of all, and it is just easier to do this way, drill from the heel cavity through the nearest pickup cavity and then into the next pickup cavity.
6 Now round out the body as you see it, or leave it square or whatever. And now you are ready to paint and stain to your heart’s desire.
7 The next section has to do with the electronics and how to wire your guitar after you have painted or stained and sealed (on the finish page you will find a few tips about these topics) and assembled your hardware using the manufactures instructions.